

About two months ago, I received a gift from a food blogger friend. I was so amazed and happy! Bee from Jugalbandi sent me a little packet containing a wonderfully cute key holder, a chocolate bar from Scharffenberger, peanut chikki (a delicious Indian version of peanut brittle) and.. a secret ingredient!
You can see it in this picture, together with the key holder:  This packet was part of a sort of 'food blogger chain', where people receive a secret ingredient from a food blogger, and in turn send another ingredient to three more food bloggers. What Bee sent me is a spice mix called 'Kootu Podi'. She explains how to use podi in this post, together with a recipe for the spice mix itself.
I loved the smell of the powder, when I opened the packet. But I didn't get to cook with it until very recently, when I finally got my own new apartment. Since then, I already made it twice, in two variations. The beauty of Kootu Podi (the dish) is that you can make it with any sort of vegetable, and apparently, even different types of dal, and various seeds or nuts. So, in my understanding, almost anything could go with Kootu Podi :)
Here you can see my two versions: In this case, I used green lentils instead of toor dal, bok choi and mushrooms as vegetables and sunflower seeds instead of peanuts.
 Whereas in this case, I used split yellow peas (probably not exactly split pigeon peas, but I didn't have enough time to actually go to an Indian store and buy the toor dal), red cabbage, broccoli and zucchini as vegetables, and again sunflower seeds.
I tried the first version with Melynda (my housemate) and the second with Simona. We liked both of them! Simona was so happy about it that I gave her part of my mix, so she will try to cook with it too :)
And I was so happy with this exchange, that I followed the chain by sending my secret ingredients to Meeta, Simona, and actually.. my mom. :) I then proceeded to buy a fourth batch for myself, as these ingredients can be found only in Italy, and I still have to try to make the secret recipe with them.. so, Meeta and Simona, be patient and hopefully soon enough you'll find on this blog the recipe to use the ingredients with!
Saturday, May 10, 2008
| [+/-] |
Le gioie del food blogging |
Wednesday, February 20, 2008
| [+/-] |
Cena turca: salsine e 'ravioletti'! |
Nicola lent me an amazingly pretty Turkish cookbook, and so last week I decided to prepare an all-Turkish dinner. Most of the things that really inspired me were the appetizers: in Turkey there are a lot of interesting so-called 'Meze', which include dips, finger food, and nice little dishes to start the dinner with. If you make enough of them (like I did....), they seem to provide by themselves a wonderful dinner. I loved the dips in particular: so easy to prepare, different in taste, and delicious!
I'll show here a few of them, starting with this delicious walnut and pomegranate dip, which will also be my entry to the 'A fruit a month' event, based on pomegranate!
Salsina di melograno e noci / Pomegranate and walnut dip/Muhammara
'Muhammara' is Arabic in origin, and can be also made with lemon juice instead of pomegranate juice. This recipe and the following ones come from the wonderful book 'The complete book of Turkish cooking', by Ghillie Basan, which I strongly recommend to anyone interested in learning about this great cuisine.
To make this dip, you can either use a mortar and pestle or, if you're lazy like me, a blender. :) Pound/blend roughly one cup of walnuts, 1 garlic clove, and 1 tsp cumin seeds, roasted. Add ~1 slice day old bread, soaked in water, and 2 tsp tomato paste. Add also 1-2 tsp sugar, 1-2 fresh chillies or 1 tsp chili powder and 2 tbsp pomegranate syrup. Instead of buying some premade syrup, I blended one whole pomegranate and added it to the dip.. So my dip looks quite different from the picture in the book, as it is less liquid. Finally, add ~1/2 cup olive oil (I added much less than that), and serve with a decoration of parsley leaves and warm pita bread! I made this dip twice (both times using the whole pomegranate, as I thought it made it really good). The second time I didn't add any hot spices, and it was still delicious!
So this dip goes to Sra at 'When my soup came alive' for the 'A fruit a month' event that she's hosting, themed on pomegranate.. great choice, Sra!
The second dip I'm presenting is based on cheese and yogurt.
Salsina di formaggio e yogurt / Cheese and yogurt dip/Pasa Ezmesi This is even easier than the other dip: just mash a ~9 oz piece of feta cheese or 'Beyaz peynir' (I couldn't find the latter, unfortunately), add ~1-2 tbsp yogurt (I actually added more, as I thought it was too solid otherwise), 1-2 tsp hot paprika, 1 small bunch parseley leaves, finely cut, and salt to taste. Serve with hot pita bread and lemon wedges, to sprinkle on every bite.. Again, this dip was so good that I already made it twice, once hot and once not, with great results in both cases. Not sure why I decorated it with mint instead of parsley.. :)
I prepared a few more delicious dips, but I have no pretty pictures of those. So, instead, I'm going to describe the last meze we had: Manti! I was very excited at the idea of making manti since I first read about it on the blog 'I love Turkish Food'. Recently, also my friend Elif posted about them. I thought of them as a sort of 'ravioli' Turkish style, but after I really looked up the recipe, I found out about a fundamental difference: Mantis are baked! Ravioli are boiled. Also, the dough for Mantis is spread a little thicker than ravioli, and the traditional shapes are a little different, although I'm sure there are many possible others. The filling that was recommended in the book is not a very traditional one (I was told by Elif), but we all thought it was delicious - and it's vegetarian!
Manti ai ceci / Chickpea parcels To make the dough, mix 4 cups flour, 1 tsp salt, 1 egg yolk and 1 whole egg. Add as much water as you need in order to obtain an elastic dough. Knead for ~10 min, and then let it rest for ~ 1 h. Prepare the filling: you'll need to have ~14 oz pre-boiled (better than canned!) chickpeas. Mash them (I had to add water for this), and add 1 tsp cumin seeds, crushed, and 1 tsp red pepper or paprika, and salt to taste. For the sauce, saute one onion and 2 garlic cloves in 1 tbsp olive oil + 1 tbsp butter. Add 1 red chilli, finely cut, 1-2 tsp sugar, and 1-2 tsp dried mint (I added fresh mint instead). Then, stir in 14 oz canned chopped tomatoes, and cook until thick. Adjust with salt and remove from heat. For the yogurt sauce, you'll have to mix ~6 tbsp thick yogurt with 2-3 garlic cloves, crushed.
By the time you're done with all this, one hour should have passed, and you can start making the manti: roll down the dough till very thin (we used a rolling pin), and cut it into small 1" squares. Spoon a little of the chickpea filling, and close the edges forming a litter pyramid: Place the mantis in a buttered oven pan, and bake at 400 F for ~15-20 minutes, till golden. Then, add vegetable stock to it. For this dose of mantis, you should add a total of ~2 1/2 cups stock, so divide it depending on how many pans you made. Cook for another 15-20 minutes, till almost all the broth is adsorbed. Then, serve with yogurt, tomato sauce, and chopped parsley on top.
These mantis are addictive! Elif told me that the dough was right, and also the slightly crunchy consistency of the manti. She never tried the chickpea filling and she really liked it too! So, I was very pleased at this success. To give credit to the right people, I only prepared the sauces and the filling for this - Lucas, Vardha, Filipe and Vlasta did all the rest of the job while I was finishing to prepare the dinner!!! Great job guys!
Friday, February 15, 2008
| [+/-] |
Interessante minestra vietnamita |
When Sunita launched 'Star Anise' as the theme of her 'Think Spice' event, I was really happy. In fact, I bought a little bag with this wonderfully-looking spice, and still didn't get to try it. I had no exact idea about what to do with it. It seems like an anise-tasting spice would go well in a dessert, but it's Lent, and I decided I wouldn't eat desserts for this time of the year (ehm, I'm not that strict, but I didn't want to make one myself, at least, unless there was a really super special occasion). So, looking for savory recipes involving star anise online, I found out that the Vietnamese soup 'Pho' is intensively flavored with this spice. Traditionally, it is made with beef. Still, I managed to find a vegetarian version that I preferred to try. What inspired me a lot about this dish was the use of spices like star anise and cloves, and also, the fact that it's served with a lot of 'complementary items' such as bean sprouts, green onions, lots of herbs, sauces, which everyone can add at his/her own taste. I thought it was a really neat idea.. so here it is, if you want to give it a shot too!
Pho vegetariano / Vegetarian Pho  The original version is here. I didn't change much of it, but I'll report it here for easiness.
Prepare the broth: quarter a small onion (do not peel it), halve 2 shallots, unpeeled, mince 8 garlic cloves (I peeled this), and roast them in a pot together with 4 cloves and 2 star anise pods (I added a little more), one 1" piece of fresh ginger, finely cut, and 2 small sticks of cinnamon. Mix every once in a while and keep roasting till the onions start to brown. Then, add 3 tbsp soy sauce and 8 cups of vegetable broth (I used 2 bouillons and 8 cups of water). Simmer over low heat for ~25 min. Then, filter and discard the solids. I think the pieces of onions and shallots were still quite good, so I kept those. Taste the broth and add salt if you'd like to. In the meanwhile, boil ~3/4 lb rice noodles in a large amount of water. According to the recipe, one needs 20 minutes to cook them, but 10 were enough for me. Drain. Stir fry 8 oz of pieces of tofu in another pan.
When ready, place ~1/4 of noodles in a bowl, add 1/4 of the tofu, and ladle 1/4 of broth on top. Repeat for 3 other bowls. Serve together with finely cut scallions, bean sprouts, Hoisin sauce, chilli sauce, lime wedges, whole leaves of fresh mint, cilantro and/or basil leaves (mint is the best, in my opinion).
This soup is an absolute delight. The taste of the anise and cloves is wonderful in the broth. Pay attention not to add to much hoisin or chilli sauce, or you'll cover it. The mint, scallions and bean sprouts are so refreshing. It's a feast, and it's so pretty that it deserves to be shown again. Of course this recipe goes to Suganya for her 'Think Spice' event, thanking her for pushing me to find a good use for such a wonderful spice.
| [+/-] |
In cucina con i food bloggers |
I know I haven't posted in a while - longer than usual! I've been really busy in this past couple of weeks. So now the list of posts I want to add is really long..
I decided I'd start with my recent passion: cooking using recipes that I read on fellow food bloggers. This allows me to learn a lot of interesting dishes, in particular from Indian cuisine, which I already mentioned I want to start getting acquainted with.
So here are a few more experiments in Indian (and not) cuisine inspired by food blogs!
Curry di ceci / Chickpea curry Bee and Jai from 'Jugalbandi' published here the recipe I used to prepare this delicious dish. I was so excited! For once, I had all the spices the recipe asked for! I couldn't find black chickpeas, though, so I had to use the regular white ones. Nevertheless, this curry was absolutely delicious. I am in love with chickpeas, and this is really a must try if someone likes them too. I found myself more comfortable preparing this than my previous Indian experiments. I think I'm starting to learn how to play with spices a little bit! Thanks Jai and Bee!
Tajine di ceci e zucca con cuscus al cocco e chutney al cocco / Chickpea Pumpkin Tajine With Coconut Couscous & Coconut Chutney Still on the chickpea crave wave, I cooked this amazing dish that Meeta at 'What's for lunch, Honey?' describes here. I decided to try this recipe one night, as I found out I would be able to use interesting ingredients that I had bought thinking about future use, and still didn't get a chance to try, such as coconut milk and fresh ginger. At the same time, this recipe allowed me to finish up some of the leftover turban squash (which I substituted pumpkin with) and coriander I had, which were going to go bad otherwise.. Last but not least, it looked quick and it was perfect for a night when I arrived late at home. Indeed, the dish was fast to prepare, even though it's composed of three separate parts (Lucas and I were pretty happy about this nice variety). All of them are wonderful. I think my tajine was a little more curry-like than it should have been, because my leftover squash was precooked, and quite soft. Still, it was delicious. I particularly loved mixing the cous cous with the chutney.. Next time, though, I'll try to use dry chickpeas. I find they have a really better taste than the canned ones. Thanks Meeta for such a wonderful recipe!
Curry di melanzane e patate dolci / Eggplant And Sweet Potatoes Curry This is another recipe that I spotted while I was preparing the last roundup for the Fresh Produce of the Month. It's by Suganya at Tasty Palettes, and you can find the original recipe (which involves squash, indeed) here. I prepared it on another night when I didn't have a lot of time to cook. It was a good choice! For a change, though, I decided to use sweet potatoes instead of squash. To be honest, I did have squash at home, but I was too lazy: peeling and cutting a squash is a hard task for me some times, and the sweet potatoes looked like a promising substitute! Indeed, they were. I used two potatoes instead of the amount of squash suggested by Suganya. We enjoyed this dish a lot - I served it with rice, as I didn't have any flat bread. It didn't have as many spices as the other Indian dishes I prepared (I may have put less of the final mixture of ground spices), so the taste actually reminded me of some Italian side dish, but with an exotic touch given by the spicy taste in the background. Thanks, Suganya, and I'm going to try this again with squash and paying closer attention to how much of the final spice mixture I add :)
Now here is a question to all the food bloggers around: what exactly defines a curry? In my ignorance, I thought a curry was supposed to be on the liquid side. More like a Thai green curry, to give an example. Yet, a lot of the curries I found recipes for (like the two I wrote about in this post) are much thicker. So, this is my general question. More in details, I recently went to a Chaat place named Vik's, in Berkeley, well-known for its authentic (and inexpensive) fast-food-like Indian dishes. Almost everything we tried was served with 'cholle', defined as 'chickpea curry'. Still, the cholle at Vik's was really nothing like the Chickpea curry that I prepared myself according to Bee's recipe. It was much more liquid (and also somewhat sweet, I recall). So, what's the difference in the two curries? Is it just a regional or personal preference?
Thanks to anybody who wants to comment on this :)
Monday, January 21, 2008
| [+/-] |
Curry vegetariano multietnico |
My first experiments of Indian cooking inspired me while I was cooking something simpler (and with no spices involved). I didn't really take the recipe from a specific cookbook, but definitely the making of this dish was related to what I read in Indian recipes from blogs such as Jugalbandi and One hot stove. So here is what I prepared: it's a vegetarian curry, with ingredients coming from cuisines from all over the world: Poblano peppers from Mexico, coconut and peanuts from India and Thailand, parseley from Italy, bok choi and tofu from China. The result was really good, and something very different from what I usually cook.
Curry vegetariano multietnico / Multi-ethnic vegetarian curry
To prepare it, dice 1/2 lb of tofu and sautee it in 1 tbsp olive oil, till brownish. Add 2 leeks, finely cut, and sautee together. Then add also 4 poblano peppers cut into pieces and keep cooking. In the meanwhile, blend together 1/2 cup raw peanuts and 1/4 cup dried grated coconut, and a small bunch of parseley leaves. Add 1/4 cup garbanzo bean flour, 1/4 cup heavy cream and 1 cup milk. Roughly cut leaves of 4 bunches of bok choi and add to the pan with the veggies and tofu. Add salt and pepper to taste. Saute for 5 min and add the blended paste. Add enough water to make a curry-like consistency and simmer for a few more minutes. Serve with basmati rice.
I loved the combination of the spiciness from the Poblano and the 'rough' taste of the bok choi, with the sweetness from coconut and the creaminess from milk. I'd like to submit this dish to the 'Weekend Cookbook Challenge', which is themed 'Veggin Out', but I'm one day late, so I'm not sure if this will be accepted or not.. we'll see. :)
Saturday, January 19, 2008
| [+/-] |
Esperimenti di cucina Indiana! |
The new year has come, and one of my resolutions was to try and finally learn how to cook Indian dishes! I love Indian cuisine, and I still didn't dive into trying it because I've always been scared by all the spices that are necessary. I love spices, too, but I don't usually keep them at home, and the most exotic one I have is turmeric.. But in the past year, I got to know so many great Indian food bloggers, so I decided I could just start trying to repeat some of the simpler recipes they show, and little by little, I would get a hand of cooking with spices! In this post, I'll summarize my first two attempts. Both of them are dal-centered: I prepared Sambar and Pumpkin Amti. The two dishes are typical of different parts of India, and it was really nice to taste them both.
Ulli (shallot) Sambar This was my very first Indian cooking attempt! I used Jai and Bee's recipe, which you can find here, so I won't rewrite it. At the time, I still hadn't visited a true Indian store, and so I didn't have all the spices requested. I know I missed very important ingredients such as tamarind, and I used spicy serrano chillies instead of red and green Indian chillies, and I had no curry leaves. In fact, when I told my friend Vardha that I made Sambar without the Indian chillies, he told me I didn't really make Sambar.. but to be honest, the result was (at least to mine and Lucas's taste) absolutely amazing. I was so excited! I actually made something that tasted really good and at least resembled closely enough an Indian dish! This opened the doors of a big adventure.
The next day I asked a few Indian friends where they buy their spices. Berkeley Bowl is great for most things, but definitely not for spices. I went to 'Milan International', and I was fascinated and lost between the hundreds of boxes of loose and packaged spices. I bought as many as I could remember the names of, and came back home happy. I also bought a traditional spice box! So for my second attempt, I was ready and had almost all the ingredients!
Pumpkin Amti This is a Maharashtrian dish, and I found the recipe on Nupur's blog, One hot stove - link for the recipe is here. I liked this dish also because it allowed me to experiment one more type of squash - I used 'delicata squash' for it, which has a really good taste. The taste of this dish was very rich - as Nupur says, there are so many flavors that mingle in it! We enjoyed it a lot, and I felt a little more comfortable while making it, and I was faster than when I made Sambar. If I must make a comparison, though, I think I enjoyed the taste of Sambar better. But the use of coconut and peanuts in the Pumpkin Amti was really inspiring, as you may see in a future post.
After these first attempts, I can give a few comments about the experience of Indian cooking. It's exciting, and I feel a little bit like a wizard. It's more complex than Italian cooking, as many things need to be cooked separated, and it's also somewhat more dangerous.. I was really coughing a lot while cooking the hot peppers on the stove :) Also, while I'm perfectly confident about not having a recipe when I cook an Italian (or European, or American) dish, I noticed that I really need precise doses to cook Indian food, for now.. but this will hopefully improve with practice! Thanks Nupur, Jai and Bee for the recipes, I'm looking forward to a year of new adventures in the kitchen..
Saturday, August 04, 2007
| [+/-] |
Waiter there's something in my... sauce! |
This month's Waiter there's something in my.. event is dedicated to sauce! I found out I'm really late, but apparently they're still waiting for entries... yeeeh!
So, I'm posting the recipe for a Mexican mole, which we made a few nights ago at a Mexican dinner we cooked at my place. It's a really special one: 'Pipian Verde' / 'Pumpkin Seed Sauce'! To make it, you have to boil 12 chiles serranos in water, for 8 minutes, then add 1 kg of tomates verdes (green tomatoes), husks removed, and boil for ~5 more minutes. Drain, remove the stem from the peppers, if there were some, and blend in a blender. Add 1/4 of onion, 2 cloves of garlic, 1 cup of cilantro, 1 leaf of lettuce (I didn't add this), and blend altogether.
Then, heat 2 tbsp olive oil in a pan, add 1 1/2 cups pumpkin seeds, and toast for a few minutes. Grind in a blender or nut grinder, then add 1/4 cup unsalted peanuts and blend together.
Heat up 2 tbsp olive oil in a pan, add the grounded nuts and cook for ~2 minutes. Add the blended tomates verdes stirring constantly. At this point, add a chicken bouillon and 1 cup water (or 1 cup chicken stock) and simmer uncovered for ~10 minutes. It's ready! (recipe from 'Mexico, The beautiful cookbook')
This mole is usually served with chicken. So, we had also boiled 3 chicken breasts with 1/4 onion, 3 cloves garlic and 3 springs of parseley for 20 minutes, and then simmered the chicken breasts in the sauce for another 15 minutes: But we had a huge amount of mole for the chicken we made.. and it's so good: creamy, nutty and spicy at the same time! My Mexican friend who cooked with us suggested to use it later with white rice, or with fish, or just breaking some eggs and cooking them in it.. I'm looking forward to trying some of these suggestions!
Thanks Andrew for organizing this round of 'Waiter, there's something in my..' - looking forward to the roundup!
Saturday, July 28, 2007
| [+/-] |
Due snacks messicani |
It looks like I've been on a Mexican food cooking crave for a while.. I still have some pictures of a dinner I cooked about a month ago for Filipe and Vlasta, with recipes taken by the 'Mexican' cookbook by Jane Milton (the same I took the Horchata and Tequila sunrise recipes from). So, this is a good occasion to write about these two wonderful snacks I made: 'Nopales salsa' and 'Plantain chips'!
Salsa de nopales / Nopales salsa What inspired me to try this recipe was the combination of nopales and tomatillos, both ingredients that I never used in my life.
  Nopales are cactus leaves! I managed to find them at the Berkeley Bowl, my source of every vegetable and fruit delight :) They are really good. The only hard thing, is that you have to remove all the thorns before cooking them. It's a bit tedious, but after a few leaves you understand how to position your knife so that in one movement you can cut a few of them at a time.
 Tomatillos are green, small tomatoes, usually sold still covered with a paper thin, crisp peel. So pretty :) They are harder and more sour than regular tomatoes. They went very well in this salsa.
Ingredients
2 fresh fresno peppers
4 nopales
3 spring onions (I didn't use these)
3 garlic cloves, peeled
1/2 red onion
5 fresh tomatillos
1/2 tsp salt
2/3 cup cider vinegar (I used apple cider vinegar)
Procedure
Roast the peppers in an anti-sticking pan, place them in a plastic bag and let them sit there for 20 min. Then remove the skin and the seeds, and cut into small pieces.
Remove the thorns from the nopales paying attention not to be poked. :) Cut the nopales in strips and then into small pieces. Boil them in slightly salted water, adding the garlic cloves and the spring onions, if you have them. They should take ~15 min to get tender. Drain them, and run cold water on them to remove the sticky juices. Discard the garlic and the onions. Then, chop the red onions and the tomatillos finely. Place them in a bowl together with the nopales and the chillies, cover with vinegar, add salt, and soak at least overnight before eating the salsa with your favorite chips!
Plantain chips Cut into thin slices two ripe plantains (skin must be black). The riper the plantains are, the more the chips will taste like bananas, whereas for less ripe plantains, the chips will taste more like potato chips. I like the ripe ones. :) Heat some vegetable oil (I used olive) in a pan. Fry the chips in hot oil, sprinkle with salt and chili pepper seeds and serve immediately. They are really delicious.
Sunday, July 22, 2007
| [+/-] |
Tortillas di mais fatte da noi! |
My passion for cooking is now well-known among my friends, and so I received four cookbooks for my birthday. There are never too many cookbooks at home, right? :) One of them is a wonderful, original, Mexican cookbook given to me by Romelia, a mexican friend of mine. It's written by a Mexican writer, Susanna Palazuelos. The book is gorgeous, there are wonderful pictures of Mexico and of the food - the title is right: 'Mexico, the beautiful cookbook'. Romelia gave it to me at the University, and when I brought it to my office, Nicola and I started looking at it and decided it was a great excuse to cook together a Mexican-inspired meal!
Nicola had 2 huge packets (4 lb each) of Masa Harina - both he and his mom bought one, thinking it would be a good corn flour to make polenta. Too bad it really isn't. :) Masa Harina is not corn flour the way we usually intend: it is made by boiling corn kernels in water and calcium hydroxide, then the kernels are washed and ground to make a flour. The masa harina we buy in the stores is then dried (I don't know if it's possible to buy fresh masa, here). So, this treatment gives the flour a very peculiar taste and consistency - definitely not good for polenta... but exactly what you need to make a huge amount of tortillas, which is what Nicola, Giovanna and I did last night. :)
Tortillas di mais con verdure, fagioli e formaggio / Corn tortillas with vegetables, black beans and cheese Making tortillas turned out to be extremely easy: just mix ~2 cups of masa with 1 1/4 cups water and a pinch of salt. Knead for 2-3 minutes, then devide the dough in about 8 balls, the size of a big walnut. Knead each ball for a few more seconds, before pressing it. It would be very cool to have the tortilla press, which of course, we didn't have. So, we used a rolling pin. To do so, place a sheet of plastic wrap on the table, then put your ball of dough on it, press it with your hand a bit. Place another sheet of plastic wrap on top, and roll the dough down with a rolling pin, trying to make it round and thin. The final round shape should be ~4 inches in diameter. Remove one sheet of plastic wrap, place the tortilla on your hand, peel off also the other sheet of plastic, and place the tortilla on a hot anti-sticking pan. Cook for ~20 seconds, then turn, cook for another 20 seconds, turn again and cook for a final 15 seconds.. and you're done!! Really easy. Of course, our tortillas weren't as round and pretty as the store-bought ones, but they were _much_ better in taste.
We prepared some vegetables and beans to put inside the tortilla: we made a stir-fry of onions, zucchini, poblano peppers, red peppers and mushroom (with olive oil, sprinkled with pepper - really good and spicy, thanks to the poblano peppers). For the beans, we went for the easy canned black beans, and we added them to sautee onions in olive oil, cooking them until almost all the liquid was adsorbed. I added salt, pepper and honey to them, while cooking. Both the beans and the vegetables were delicious. We also prepared some Queso fundido con champinones y rajas de poblano (melted cheese with mushrooms and poblano peppers) (idea from the Mexican cookbook)- you can see the pepper version here and on the right bottom corner of my tortilla. This was easily prepared by microwaving for 1 minute some good mild cheddar cheese decorated with stripes of pepper or pieces of mushrooms.
The cheese was great to eat also with our home-made tortilla chips: We prepared these by cutting into pieces some of our tortillas, and baking them in the oven at 450 F for ~ 5 minutes. We went for the baked healthy version, but traditionally they should be deep fried. Still, the healthy version was quite good! You can see here Giovanna kneading the dough and Nicola eating the tortilla chips with salsa. :)
 Making tortillas and eating them in such a nice company was a lot of fun. Must be repeated! :)
Sunday, May 27, 2007
| [+/-] |
Melanzane ripiene turche |
This month's event 'Waiter there's something in my...' is themed 'stuffed vegetables or fruit'. So I decided that I will post the recipe for the Turkish stuffed eggplants that I helped Elif to prepare at our Turkish dinner. Elif told me that the exact name for it is Imam Bayildi, which literally means 'The Imam passed out'!!! She thinks it's becuase they're so good. :)
Imam Bayildi / Turkish Stuffed Eggplants  Ingredients
Six eggplants. Buy the small, elongated ones.
Six garlic cloves
Four big tomatoes
1 large red onion
3 small 'Italian' peppers
parseley, sugar, salt
Procedure
Peel the eggplants 'in stripes' (leave one stripe of skin and one stripe with no skin, for a total of 2 stripes with and 2 stripes without skin). Make a deep incision in them on one of the unskinned stripes, along the length (to open up a pouch to stuff them). Spread some salt on them, included inside the incision, add water on them, and set aside. Cut the tomatoes, the onions, and the garlic. Sautee onions and garlic in olive oil, and add tomatoes, a little sugar and salt. Add a few leaves of cut parseley. Remove from stove when finished sauteing. After ~ 30 min, drain the eggplants, and stir fry them, whole, in olive oil, for ~ 10 min, turning them often. Cut the eggplants along one of the skinless 'stripes', making a dip incision. With a spoon, remove the pulp. Mix the pulp with the sauteed tomatoes. Place the eggplants on a baking pan and fill them with the tomato/eggplant mixture: Cover them with a piece of aluminum foil, and put them in the oven preheated at 350 F. Cook for ~40 minutes. In the meanwhile, stir fry the peppers, cut into halves. When the eggplants are ready, cover each of them with half pepper.
Serve them hot. They're absolutely amazing.
Check back on this post, I'll let you know when the roundup for the 'Waiter there's something in my...' is up!

Sunday, April 01, 2007
| [+/-] |
Lahmacun - pizza turca |
I recently found Meeta's wonderful blog 'What's for lunch honey', and her monthly event 'Monthly mingle'. Too bad I didn't see the past mingle.. it was 'savory cakes'! How many wonderful savory cakes we have in Italy!! Well, I'll post some recipes for savory cakes later on anyway.. And this monthly mingle's theme is as intriguing: 'Arabian nights'! So the goal is to make some food coming from 'Arabian' countries, very broadly defined. I recently met Elif, one of Lucas's coworker, a very nice girl of Turkish origin, and so I asked her what would be a good original turkish recipe for me to try for this event. She suggested 'Lahmacun', aka 'turkish pizza'. Apparently some people say pizza was invented by Turkish.. so I thought it was actually a nice thing for me to try, since I love making pizza. I found a few recipes online, and the one I finally followed can be found here. I'll report here what I did.
Lahmacun Make pizza dough (see here) using ~2 cups flour, ~1 tsp yeast and 1 1/2 cup water. Oil the surface of the pizza dough while it raises. Prepare the topping: 1) sautee one small onion and 2 garlic cloves in some butter; 2) Grind some lamb meat (supposedly 8 oz). Add 1 tomato, the juice of one lemon, 1/2 cup mint leaves, 1/2 cup parseley leaves, 2 tsp paprika, pepper, salt, and mince everything with the meat. Add the onion and garlic to the mixture. This is the traditional topping. I decided to try also the vegetarian version, which is made with 1 cup feta cheese, 1 egg, 1/4 cup parseley, all blended together. After the dough doubles in volume (~1 hour), devide it into three pieces. Let them rest for another 30 min. Then, roll them down until very thin. Spread a thin layer of meat or of cheese mixture. Cook in the oven at 450 for ~12 min for the meat pizza and ~7 min for the cheese pizza.
I read different ways of serving Lahmacun. Most of the recipes suggested to sprinkle lemon juice, especially on the meat version. Some of them suggested also yogurt. I tried them both and I liked them! It's a very nice dish. I liked the meat version in particular.. definitely not suited for a vegeterian, but the blend of spices, herbs and lemon made it very particular and 'oriental-style'! So, go Lahmacun! Go Turkish pizza! And notice, this is said by an Italian who hates fake American pizza. :)
Visit Meeta's blog for the Monthly mingle roundup.
Monday, March 05, 2007
| [+/-] |
Pozole fatto da Luisa |
A long time ago, when Lucas came to visit me in Raleigh, Luisa invited us for dinner in order to let us try this delicious Mexican soup, called Pozole. I have time only now to post a picture and the recipe Luisa gave me for it! Thanks Luisa!!!!!!!!! It's really delicious.
Pozole Ingredients
3 pounds of Pork meat with bones (I use the Spine/back)
4 garlic cloves
1 white onion
1 can of crushed tomatoes (or 4-5 fresh red tomatoes)
1 medium size can of hominy (lime cooked corn kernels)
3 huajillo peppers (dried)
3 ancho o pasilla peppers (dried)
black pepper
salt
dried oregano
roman lettuce
red radishes
limes
The meat/broth:
In a pan, bring 3-4 liters of water to boil. Add Salt, 2 garlic cloves, half of the onion, black pepper and the pork, a dash of oregano. Cook the meat until is soft.
In another pot, boil the chilies (peppers) until they soften, then remove seeds and “pedicels” from peppers. Grind in blender with some of the meat broth, tomatoes, 2 garlic cloves and half the onion. And this salsa to the broth, keep boiling. Also add the hominy. Let it boil for 30 minutes.
I do the next separated, this way is easier to remove the bones, but in my home town we actually serve bones and meat together. Once the meat is cooked, remove it and transfer to another pot, add 1 liter water, add salt, and boil for another 30 minutes, until it separates from the bones. Remove bones and smash the meat. Remove the bone if you like…
To serve, serve the red broth with hominy, add meat. Add slices of lettuce and radishes, sprinkle some oregano and with onion cut in little squares. Also you may add some lime juice. Serve with the tostadas. In Guanajuato state, they also put some sour cream on the tostadas.
Buen provecho!
Sunday, October 15, 2006
| [+/-] |
Cena indiana - ovvero terza cena italiano/spagnola |
Our last Spanish-Italian dinner had an Indian theme at it was hosted at Luisa's and Jorge's house. There was a lot of food, and I have a sample of everything on my plate: From the top: spicy shrimp, samosas, aromatic rice, rice with lentils, fish kofta, naan bread and pakora (in the center).
The shrimp and the rice with lentils were made by Luisa, the samosas by Crissy, the pakora by Mariana, and the aromatic rice, the fish and the bread by me. The food was very good. There were also desserts.. I can give real Indian names and recipes of the dishes that I made below. Btw, I took all the recipes from this wonderful cook book that my Aunt Carla gave me some time ago. It's called 'Cooking glass Indian', from the 'Women's weekly cookbooks', and it's really nice. Any recipe I tried from that book turned out wonderful! Grazie mille, zia :)
Fish kofta
Boil some water, add salt and throw pieces of white fish fillets in it (1 1/3 lb=700 g), until cooked. Strain fish and reserve 2 cups of broth. Blend fish with 1 onion (cut into pieces), 2 spicy peppers (red in the recipe, I used green ones), and 1/4 cup fresh cilantro leaves (I used ginger instead). Shape the mixture into elongated cilinders: Heat 1/2 tbsp butter (ghee in the original recipe) in a non-sticking pan, and grill the fish kofta until browned on each side.
Heat 1/2 tbsp butter (ghee) in a pan, add one minced onion, 2 cloves of garlic, minced, 2 tsps ground coriander, 1 tsp ground cumin, 1/2 tsp ground turmeric, 2 sticks of cinnamon and sautee for a few minutes. Add 3 tomatoes (I used a big can of diced tomatoes), cook until tomatoes are soft, add the fish liquid, and simmer uncovered until sauce thickens. Add fish kofta gently and let them adsorb the liquid for about 5 min. Serve sprinkling with fresh coriander leaves.
It's really really good. It's a bit laborious to prepare, though, I must say: it's hard to grill the kofta without breaking them.
Parsee rice
This is the aromatic rice I made. It's extremely easy to make and the taste is wonderful, really indian. So, to make it, heat 1 tbsp butter (ghee) in a pan, stir in 2 small onions (minced), 3 cloves of garlic (crushed), 3 tsp cumin seeds, 2 tsps black mustard seeds, 4 cardamom pods, 2 bay leaves (I didn't have these so I didn't add them), 1/2 cup (75 g) shelled pistachios. Cook for about 5 minutes. Add 1 1/2 cups (300 g) basmati rice, previously washed and drained. Stir for a few minutes and add 2 3/4 cups (680 ml) chicken stock. Simmer covered for 15 minutes. Remove from heat, fluff with fork and stand for 10 minutes covered before serving.
Naan
Naan is one of the best Indian bread. It's originally from the north of India, and it's cooked in a Tandoor oven. In its absence, a grill or a heavy-base pan on a very hot stove can do.
Add 1 tsp dry yeast and 1 tsp sugar to 2/3 cup of warm water. Mix and let stand for 10 min in a warm place. Mix 2 cups (300 g) plain flour and 1 tsp salt in a bowl. Add yeast mixture, 2 tbsps melted butter (ghee), 2 tbsp yogurt. Mix until you have a soft dough. In my case I thought I needed some more flour, so be aware of this. Kneed on a floured surface for at least 5 minutes, until the dough is elastic. Let stand in warm place, in a lightly greased container for 1 1/2 hour or at least dough doubled its volume (1 hour for me). Then, knead dough for another 5 minutes and divide into 6 balls. Flatten with a rolling pin until you obtain round 20 cm (~8 inch) Naan.
The best way to cook this would be to have a small grill that you can place directly on your stoves, so it gets really hot. I looked for it but couldn't find it. So, I lightly buttered a non-sticking pan and placed it on High heat on the stove. Once the pan is very hot, place one round disk, grill for about 2 min each side or until puffed and browned. Sprinkle with onion seed (I didn't do this) and grill for further 30 sec.Rebutter the pan in between each Naan. Keep Naan warm before serving it. It's really delicious (and Crissy just told me that Naan bought at the grocery store costs $9 for 2 disks!!!!).
As I mentioned earlier, we also had desserts! (Yes, we had a lot of food :) )
Luisa made this delicious Mango mousse: And I made a semolina pudding.
Rava Kesari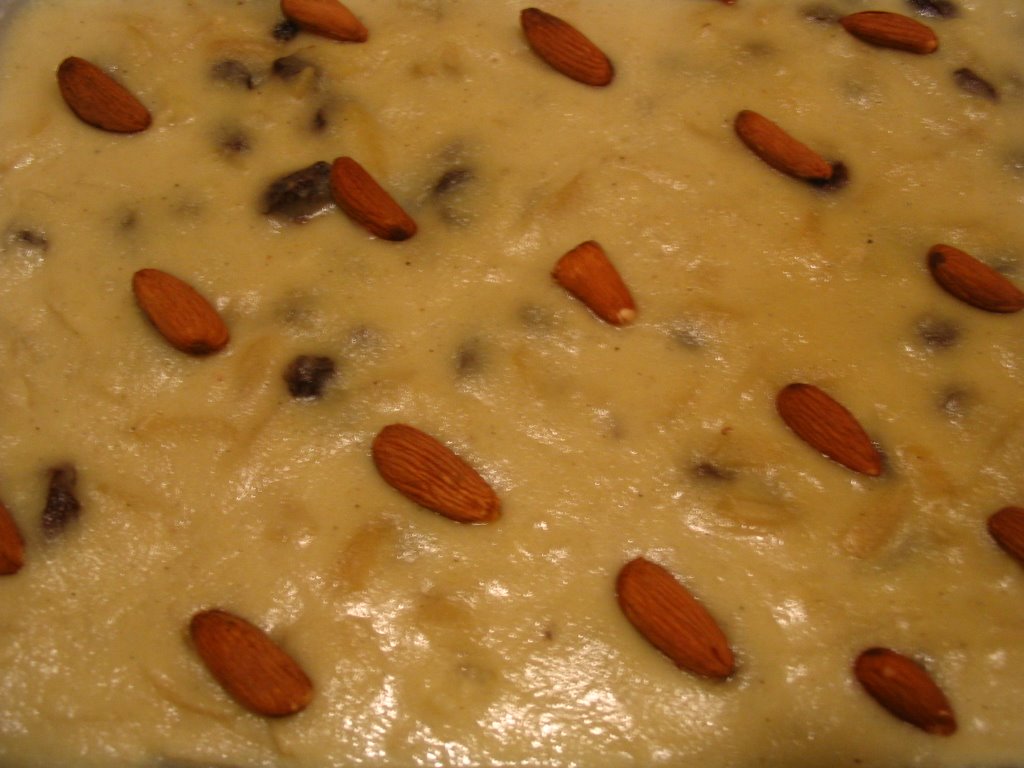 Combine 1/2 cup sugar (1 cup in the original recipe! But to our taste, this sweetness was perfect), 1 1/2 cup water, 1/2 cup milk, 1 tsp ground cardamom in a pan and heat stirring until sugar is dissolved. Heat 4 tbsps butter in a pan and add 1 cup (160 g) semolina. Stir for about 1 min until all semolina is covered with butter. Add water mixture and cook stirring until the mixture thickens and detaches from the borders of the pan. Add 2 tbsps raisins and 2 tbsps slivered almonds. Spread mixture in pre-greased rectangular 19 cm x 29 cm pan, and add whole almonds on top, dividing the dough into diamond shapes. Refrigerate for at least 4 hours. After this time, the dessert should be firm enough to be cut and divided. Mine wasn't :( - the taste was still good, but it was more like a real pudding. I think I didn't evaporate enough of the water/milk mixture.
During the dinner, we spoke a lot of English!! Shame on us :) - but actually after the dinner Luisa and I spent a long time speaking in Spanish about pretty serious issues. :)
I forgot to take pictures of ourselves at this dinner! I'll do better next time.
Saturday, October 14, 2006
| [+/-] |
Cena giapponese - ovvero seconda cena italiano/spagnola |
I've been again struggling with work issues and did not have time to write about all the nice things that I took part to during these last few weeks.
So, starting from the oldest event, here is the second Italian/Spanish learning dinner!
This time, we decided that the theme would have been Japanese cuisine, according to what Mariana suggested, and also inspired by the fact that Trino bought some Sake that we didn't drink yet :)
Lucas and I prepared some salmon-cream cheese and some crab meat-veggies sushi. I like this picture of myself at work making Wasabi sauce :)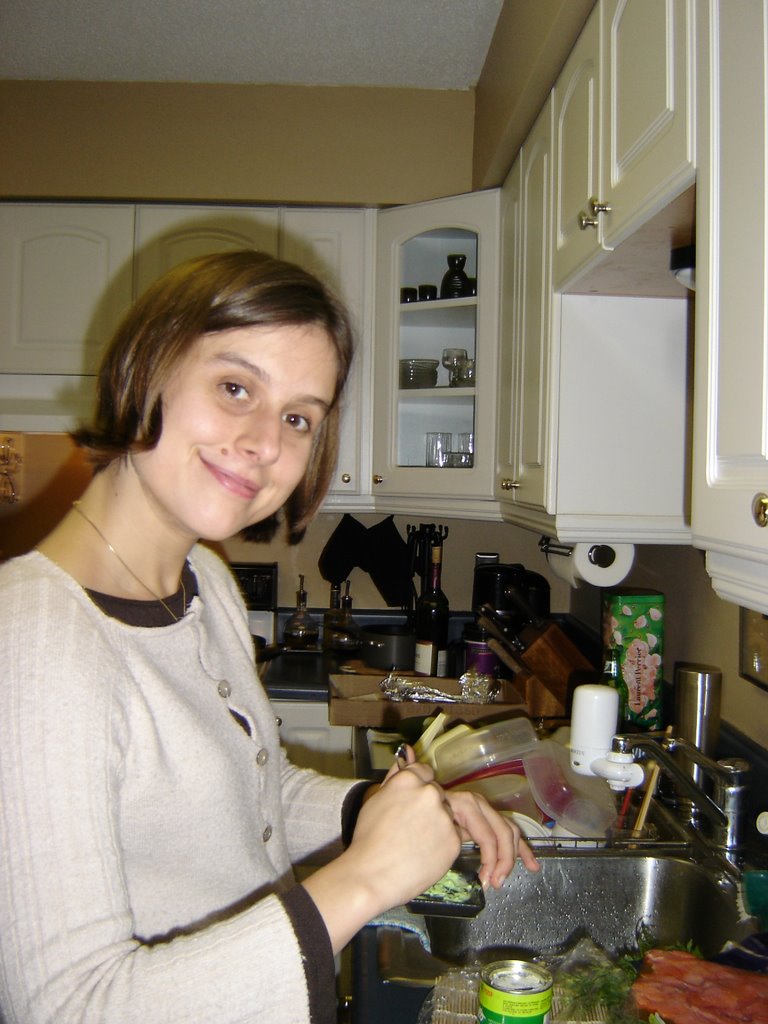
And here is our sushi: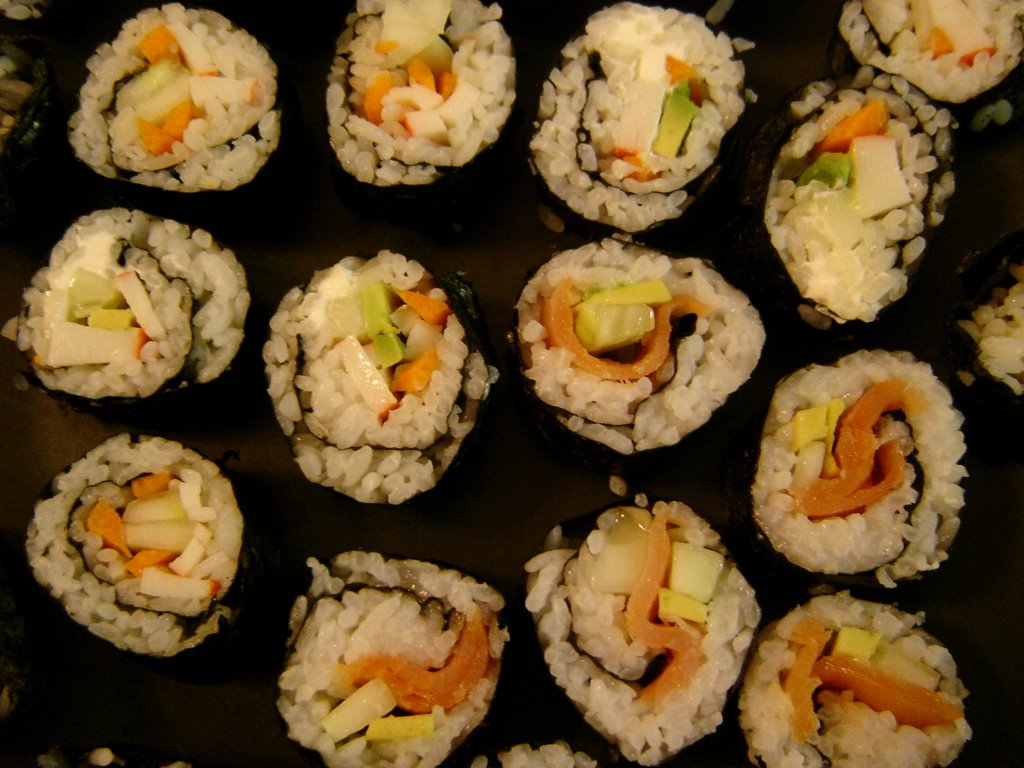 Are you curious to know how we made it? It's actually really easy. You have to buy the Nori (the black algae that rolls up the sushi) and it's better if you also buy a bambu-mattress that helps the rolling operation. Then you have to prepare sushi rice: wash the rice until the water runs clear, then leave the rice soaking in water for half an hour. Add rice and water in the rice cooker, or in the steamer, or in a pot. The proportion depends on how you're cooking it. I used a steamer and used the usual proportion that I use for any other type of rice. When it's cooked, add a few drops of rice vinegar to it and stir through.
Cut the veggies that you want to use (e.g: carrots, cucumbers, avocados) in thin stripes. Cut the fish meat in stripes.
For the assembly: place a Seran wrap foil on the sushi rolling mattress, then place the nori on it with the shiny side up. Moist your finger tips with rice vinegar. Spread a thin layer of rice on top of the nori, leaving about 1/2 inch uncovered on one of the horizontal ends. Put some pieces of the veggies on top of the other end of the nori, in one long stripe across, in the horizontal direction, together with some of the fish (and of cream cheese if you like). Then, roll tightly the nori on itself helping yourself with the mattress. Stick the end of the nori that wasn't covered with rice to the rest of the nori, to seal.
Once you make a few rolls, cut them altogether in 6/8 pieces each. Serve with Soy sauce and wasabi sauce and ginger.
Maybe next time I make it I'll take pictures of the various phases of the assembly, so it's easier to understand.
Mariana is an expert Japanese cook. She prepared these wonderful dishes: Tamago - the rice is put on top of a sort of 'omelette', which is a bit sweet, and is folded many times. It's really delicious.
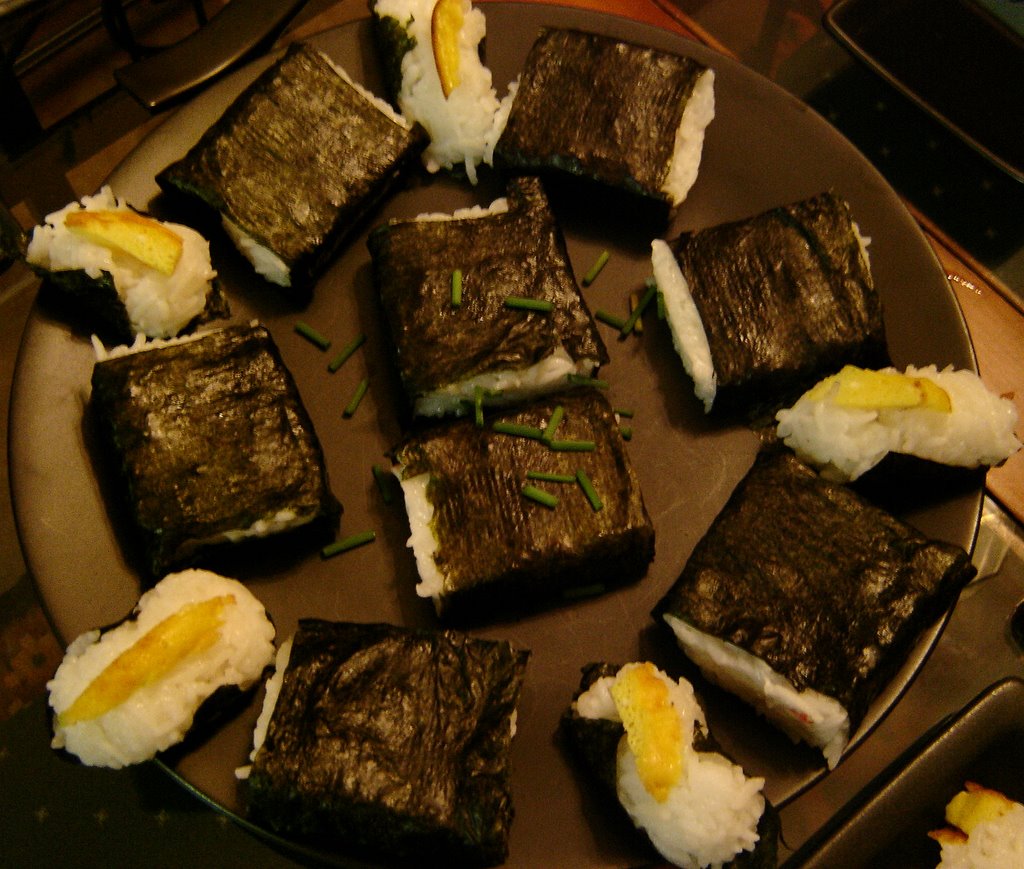 She did not remember the name of this :) It was a sort of sushi sandwich, with cream cheese and some veggies inside :)
Luisa made this wonderful tempura. It was amazing.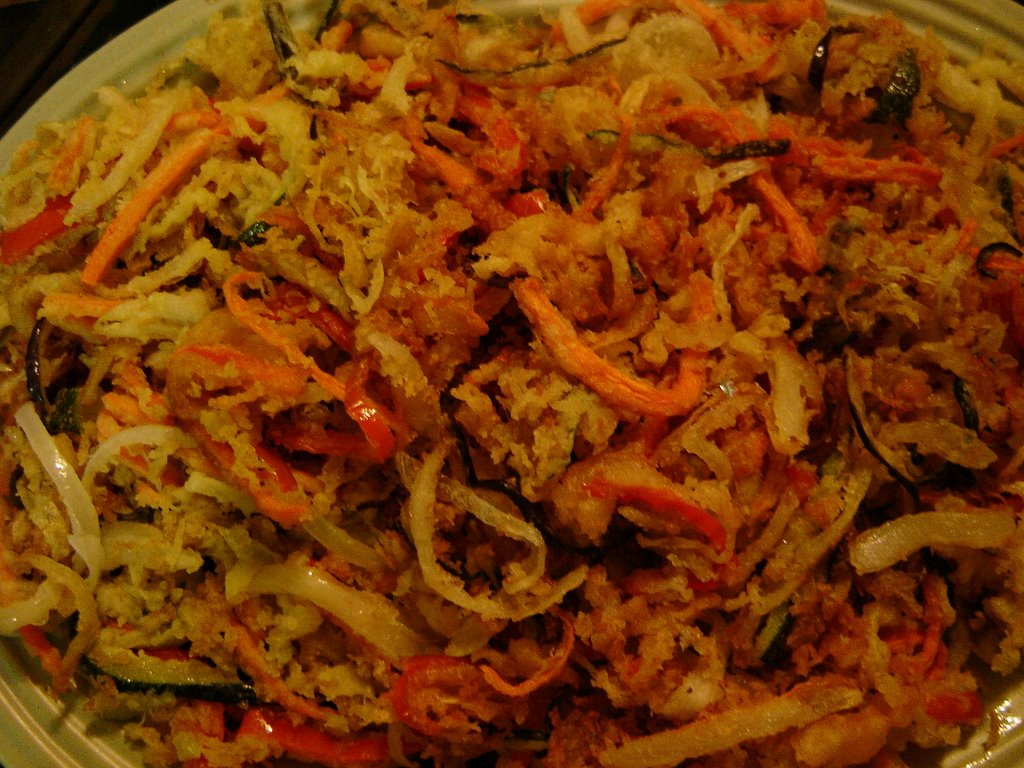 And Jorge prepared this really wonderful salmon Teriaki! On a bed of Bok-choi, which was delicious:
 I was really surprised about how good this Japanese food was, even though prepared by Mexicans and Italians!
And I feel like I'm really improving my Spanish, now I can almost understand full speed and I'm learning a lot of words. I'm really really happy. And this is just a last picture as a memory of the dinner.. unfortunately Mariana and Jorge are not in the picture, but I'll try to catch them at the next dinner! From left to right: Ross, me, Lucas, Luisa and Trino. Ross recently came back from Italy to go to work in Duke! and she was very happy to be again at Trino's and Mariana's. :)
Friday, August 11, 2006
| [+/-] |
Lezione di tamales |
I have been wanting to publish this post for a long time, but I never had time. Tonight I'm taking a night off from writing the proposal that I have to write by next Friday.. but I think I really don't feel like working now!
So, about two weeks ago, Luisa and Jorge invited us to go to their place, so Luisa could teach me how to make tamales! She said they're usually a winter food, but we thought it would be nice to make them together whatever season it was :) - so, we made some tamales with meat and some sweet ones with pineapple.
To make them, you need to have some flour that is specifically prepared from corn for tamales (Maseca for Tamales). Supposedly you could make it yourself, like real cooks do, but it's much easier to buy it premade, and apparently, Mexicans do that too :) For the sweet tamales, mix 2 cups of flour with 2 cups of pineapple juice, 1 cup of sugar, 1 cup of vegetable shortening or butter and 1 tsp of salt. You then fluff the dough up in the mixer for a few minutes.
To make the meat filled ones, you need to prepare the pork in advance: boil two pounds of pork chops in 2 liters of water for one hour, with some salt, half an onion and 1 clove of garlic. Remove the meat, let it cool down and shred it. Then you need to prepare the salsa: boil 4 huajillo peppers and 4 ancho peppers, just to make them soft. Remove the veins and the seeds. Process them together with 2 garlic cloves, 8-10 peppercorns, 1 clove and 1 small piece of cinnamon in the food processors.
You can see all the spices together here: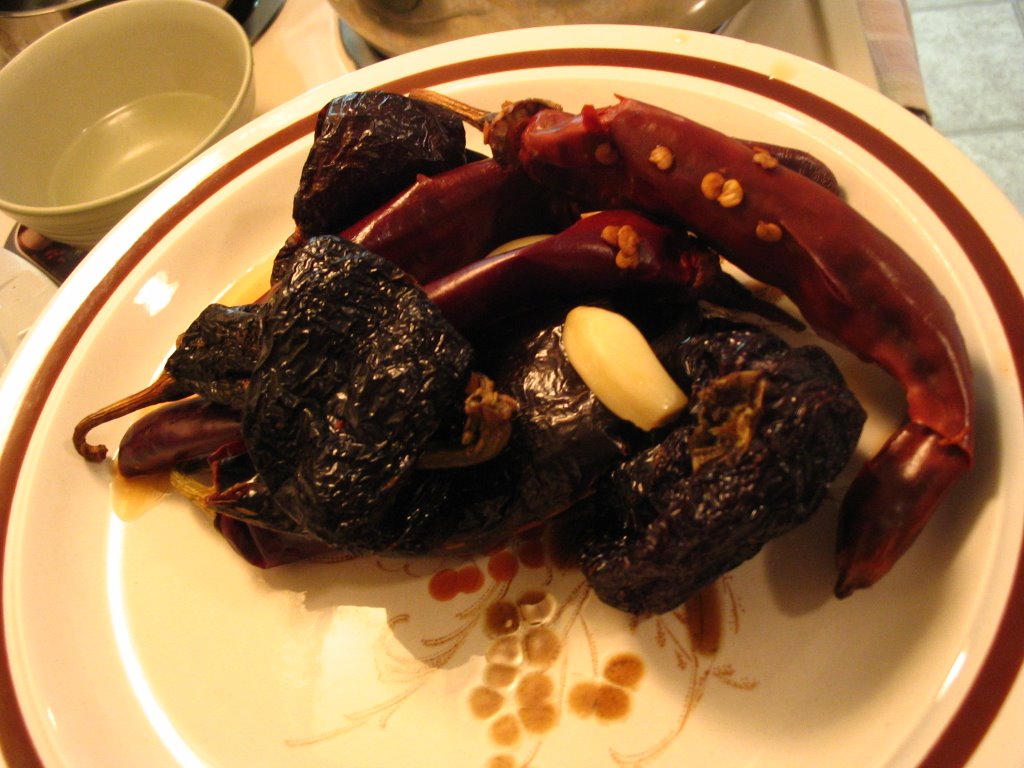 . In a pan, melt 2 cups of pork lard, add the minced peppers and spices, the meat, 2 cups of pork broth and let it simmer for a while. The let it cool down and the meat will separate from the fat. Mix 1 cup of this fat with 4 cups of maseca flour and 1 tsp of salt.
To make the tamales, you need to take corn husks for the sweet ones, and banana-like tree leaves for the meat ones. These leaves are humongous! You can see a part of one of them hold by the tamales Master, Luisa :)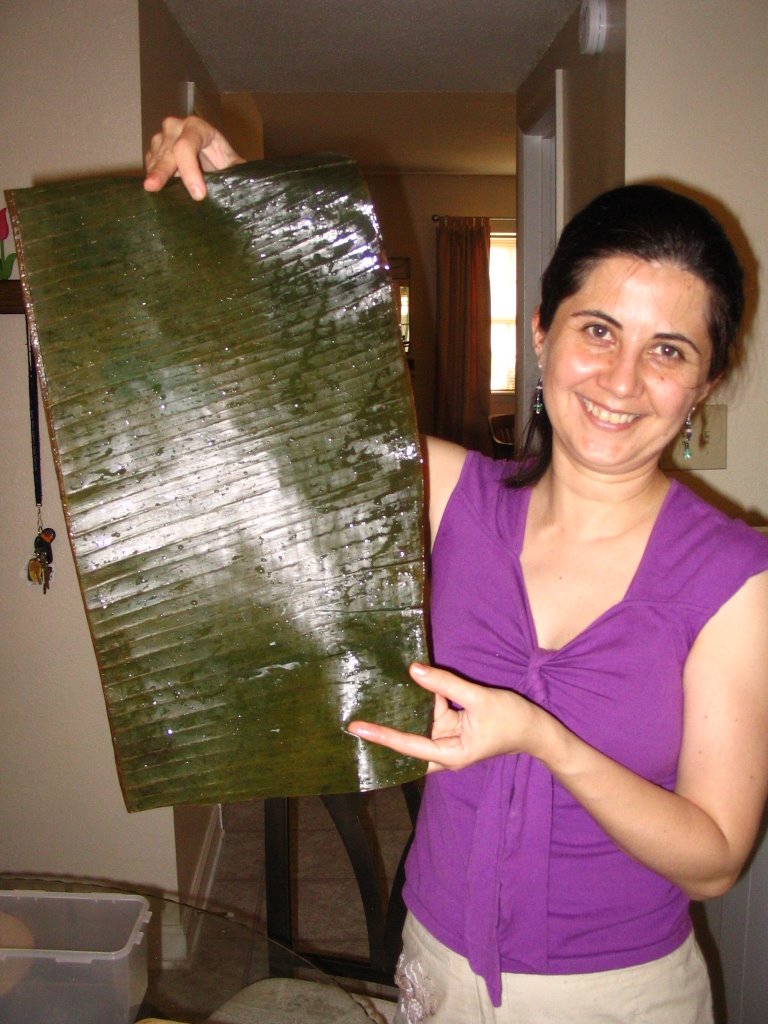 And Luisa told me that many people grow these trees in their gardens just to take the leaves to make tamales :) So, once you have the doughs ready, you can spread the sweet ones making small circles in the corn husks, then put some pieces of pineapple on them and them close and seal the husks. To make the meat ones, you put the dough on the banana-like leaf, then you add some of the meat, and then you seal the leaf. This is how it looks like before sealing:
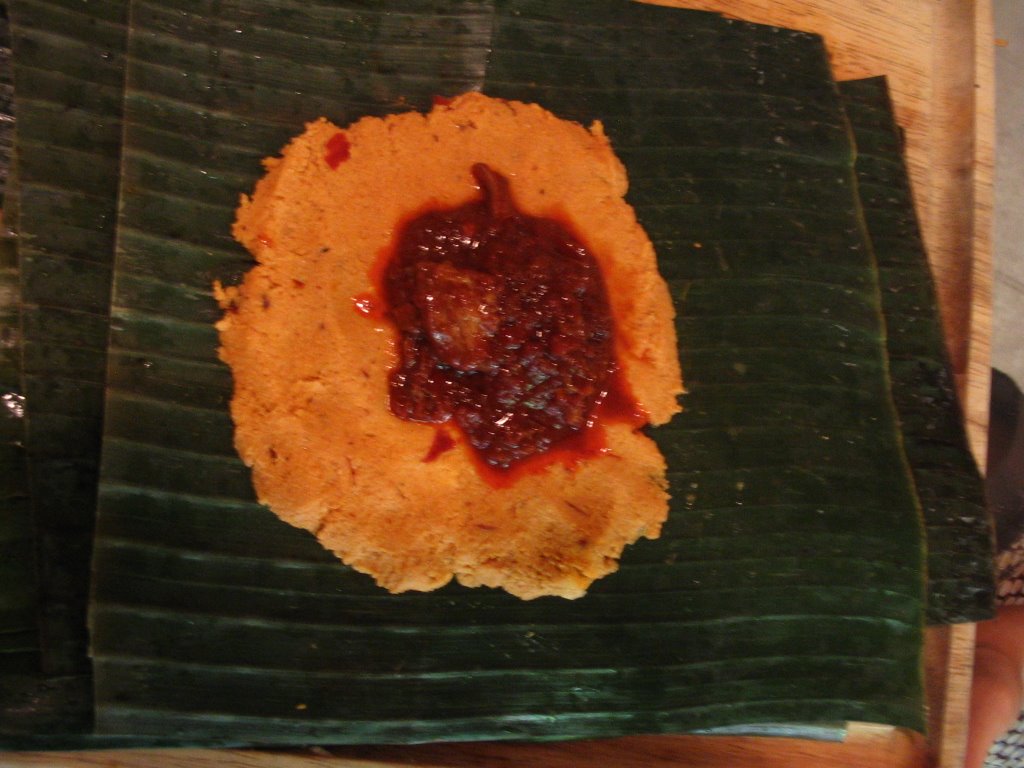 The tamales are steamed for about 1 hour in a special steamer pan:
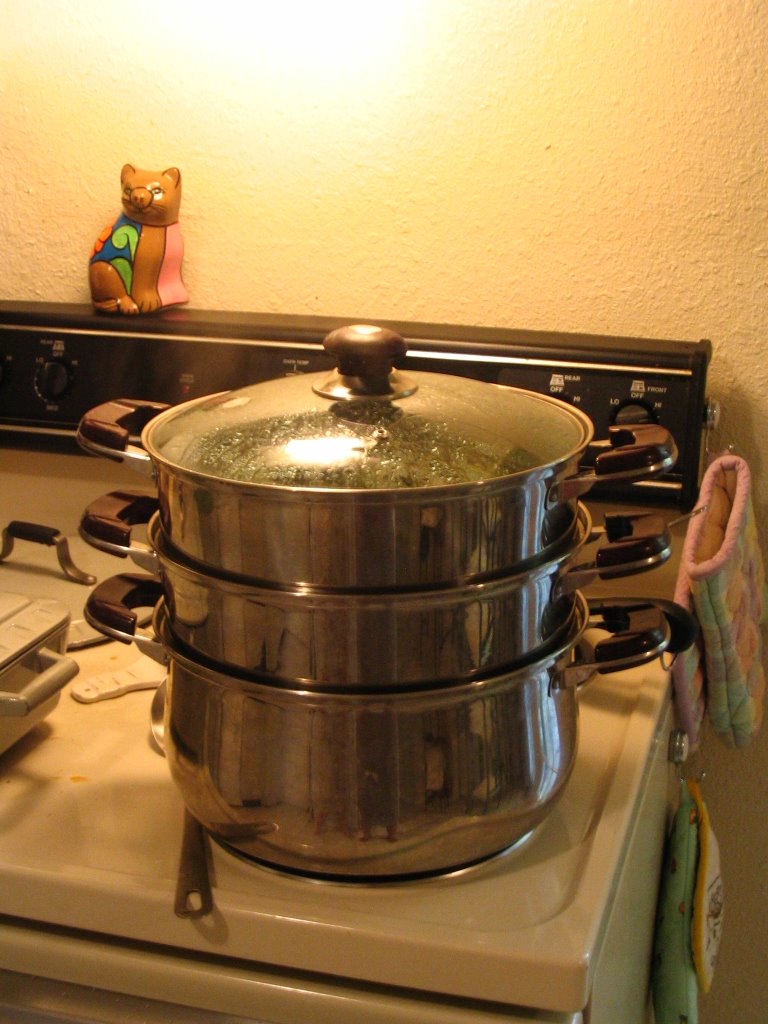 And finally they are ready to eat, after taking them out from their nice wraps:
 Definitely not a 'diet' food, but so nice to see and full of flavor! Moreover, they keep for about one week in the fridge. In fact, as a curious note: Luisa explained to me that the Tamales were once made during the Holy Week (Eastertime), because people were so busy going to church every day that they didn't have time to prepare their food!!!
Tuesday, March 28, 2006
| [+/-] |
Seconda cena messicana della scorsa settimana |
I promised I would have written also about the second Mexican dinner that we were nicely invited to last week.. and in fact, it's really worth it, since it was a wonderful dinner.
The guests were coming from all over the world: Italy, Spain, Bosnia, Portugal, US. I think everyone enjoyed very much this Mexican dinner.
It started with a soup: Crema de Flor de Calabaza (Zucchini squash flower soup)  It was very delicate and nice.
The entree was Chiles en Nogada (Peppers in a Nut sauce). This was one of the most wonderful foods I ever ate in my life. Luisa made two types of peppers, one sweet and one spicy. The one in the picture is a spicy one. She roasted the peppers, and filled them with a mixture of pork and dried caramelized fruits, all ground together with spices such as cinnamon. Then she covered the stuffed peppers with a sauce made with walnuts and heavy cream, and she garnished it with pomegranade seeds. It was absolutely delicious.
I asked her for the recipe.. she gave me a Spanish version of it, which I will translate it English and add some comments on it when I actually try it. But if you understand Spanish, here it is:
Chiles en Nogada
Se recomienda empezar una noche antes para remojar la nueces toda la noche!
Picadillo:
1 kilo de Carne de puerco sin hueso*
½ cebolla picada
2 dientes de ajo finamente picados
1 cucharadita de sal (al gusto)
*(Yo he usado combinacion de lomo y espaldilla, pero pierna o una parte no sea tan reseco seria lo mejor! No uses carne molida, el sabor es muy distinto!)
Cortar la carne en cuadros grandes. Ponerlos una olla junto con el ajo, cebolla y sal. Cubrir con agua y dejar hervir hasta que la carne quede suave )unos 40’45 min.
Deje la carne enfriar en el caldo.
Despues drene la carne y cortela en trozos pequeños (o bien machacarla)
Conserve el caldo y la manteca del caldo!.
Picadillo-2:
6 cucharadas de manteca de cerdo (o bien la grasa del caldo)
½ cebolla picada
3 dientes de ajo (pelados y finamente picados)
4 clavos de olor
½ varita de canela
3 cucharadas de pasitas
2 cucharadas de almendras
3 cucharadas de Acitron (o fruta cristalizada) finamente picado
2 cucharaditas de sal (o al gusto)
¾ de jitomate
1 pera, pelada y sin semilla y en trozos finos
1 durazno, pelado, sin semilla y en trozos finos
En una sartén, añadir la manteca y fundir a fuego lento. Fria la cebolla y el ajo picados, hasta que esteén suaves, pero sin dorarlos mucho.
Adicione la carne y déjela cocinar hasta que empiece a dorarse.
En liquadora o molcajete, muela las especias y adicione junto con el resto de los ingredientes (yo muelo los tomates o incluso uso pure o pasta de tomate)
Cocine la mezcla por unos minutos.
Los Chiles:
Ponga 8 chiles poblanos a flama directa para pelar…eso ya lo sabes!
Pele, elimine las semillas y las venas. Enjuague!
Rellene los chiles con el picadillo. Pongalos aparte, que no se escurran.
La nogada:
20-25 nueces frescas (son mejores las blancas, communes en navidad!)
Una vez peladas, remojelas en leche toda la noche.
Despues del remojo quitar la pelicula o casacarilla que las recubre
*(yo no hago esto, es una lata, se supone que quedra mas cremosa sin la cascarilla)
el dia de servir: en la licuadora añada:
Las nueces remojadas
1/4 de queso fresco (yo aqui uso queso crema)
1 ½ tazas de crema fresca (espesa)
1 ½ cucharas de azucar
una pizca grandecita de canela molida
Mezclar todo en licuadora hasta que que quede una mezcla suave (si no queda muy espesa le puedes poner pan blanco, licuar y listo)
Para SERVIR:
Coloque los chiles en los platos, cubralos con la nogada y rocielos con granitos de Granada.
Qudan riquisimos!!!
She said it takes a bit to make them, but the result is really worth it... :)
For dessert, we had Tamales de pina (Pineapple tamales)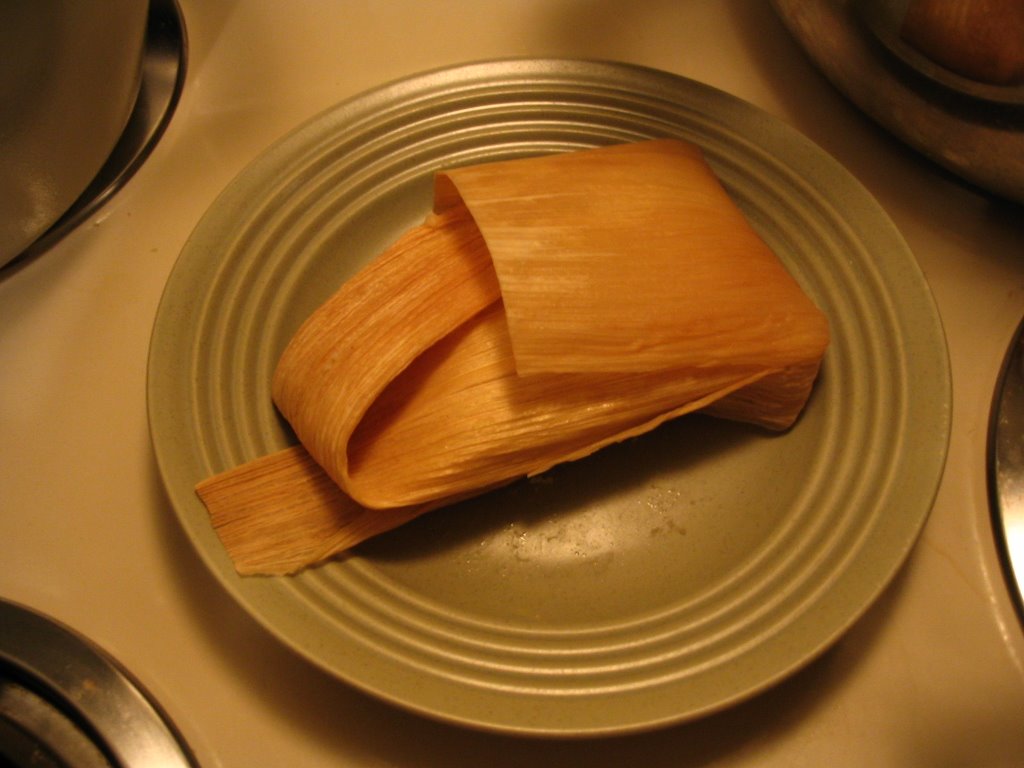 This was also very good.. in fact, I decided I would make an exception to my promise that I wouldn't eat sweets for Lent in order to try it :) (I tried to convince myself that it wasn't really sweet, which in fact was true.. :) )
Inside the corn leaf that you see in the picture, there was something soft and delicious made with cornflour and with little pieces of pineapple. I liked it so much that I decided that I would take advantage of the exception and take a second piece of it. :)
In summary, it was a wonderful evening. We ended up watching a lot of pictures from Luisa and Jorge's wedding, which were very nice, enjoying each other company in their "Home sweet home" (or "Hogar dulce hogar", as was stated in a nice sign hung on the kitchen wall :) )